Quick answer:
What to Expect During a Mold Inspection
A mold inspection is more than a quick look at walls or a few readings with a moisture meter. A proper inspection is a step-by-step evaluation designed to identify moisture problems, visible mold growth, hidden damage, and conditions that may allow mold to return.
At Masterpros, we focus on finding the source of the problem first. Mold is usually a symptom of moisture, so the inspection should help answer three important questions:
Where is the moisture coming from? How far has the damage spread? What steps are needed to correct the issue safely?
Why Mold Inspections Matter
Mold can grow behind drywall, under flooring, inside closets, around windows, in attics, or near HVAC systems. Sometimes the first sign is not visible mold at all — it may be a musty odor, elevated humidity, allergy-like symptoms, staining, bubbling paint, or recurring discoloration after cleaning.
A professional mold inspection helps identify whether the issue is related to:
Plumbing leaks Roof leaks Window leaks HVAC condensation High indoor humidity Poor ventilation Previous water damage Hidden moisture inside building materials
The goal is not just to confirm mold. The goal is to understand why it is happening.
Step 1: Initial Walkthrough and Customer Interview
A good mold inspection starts with a conversation.
The inspector may ask:
When did you first notice the odor, stain, or visible growth? Has the property had any recent leaks or water damage? Does the issue get worse after rain or when the AC is running? Has any remediation or repair work already been completed? Are there specific rooms where symptoms or odors are worse?
This information helps guide the inspection and narrow down likely moisture sources.
Step 2: Visual Inspection of Affected Areas
The inspector will visually evaluate accessible areas of the home, especially rooms where moisture or mold is suspected.
Common areas checked include:
Walls and ceilings Baseboards Closets Bathrooms Kitchens Laundry rooms Attics HVAC closets Around windows and exterior doors Flooring and carpet edges Areas near plumbing fixtures
Visible signs such as staining, peeling paint, soft drywall, warped baseboards, condensation, discoloration, or microbial growth can help determine where further testing or moisture readings may be needed.
Step 3: Moisture Detection
Moisture detection is one of the most important parts of a mold inspection.
Professional inspectors may use:
Moisture meters Thermal imaging cameras Hygrometers Infrared inspection tools
These tools help identify hidden moisture inside walls, ceilings, floors, and other building materials.
However, tools alone do not diagnose the problem. Moisture readings must be interpreted correctly based on the material, building conditions, humidity level, and location of the damage. A high reading near a bathroom wall may suggest a plumbing issue, while elevated moisture on an exterior wall may point to window intrusion, roof damage, or condensation.
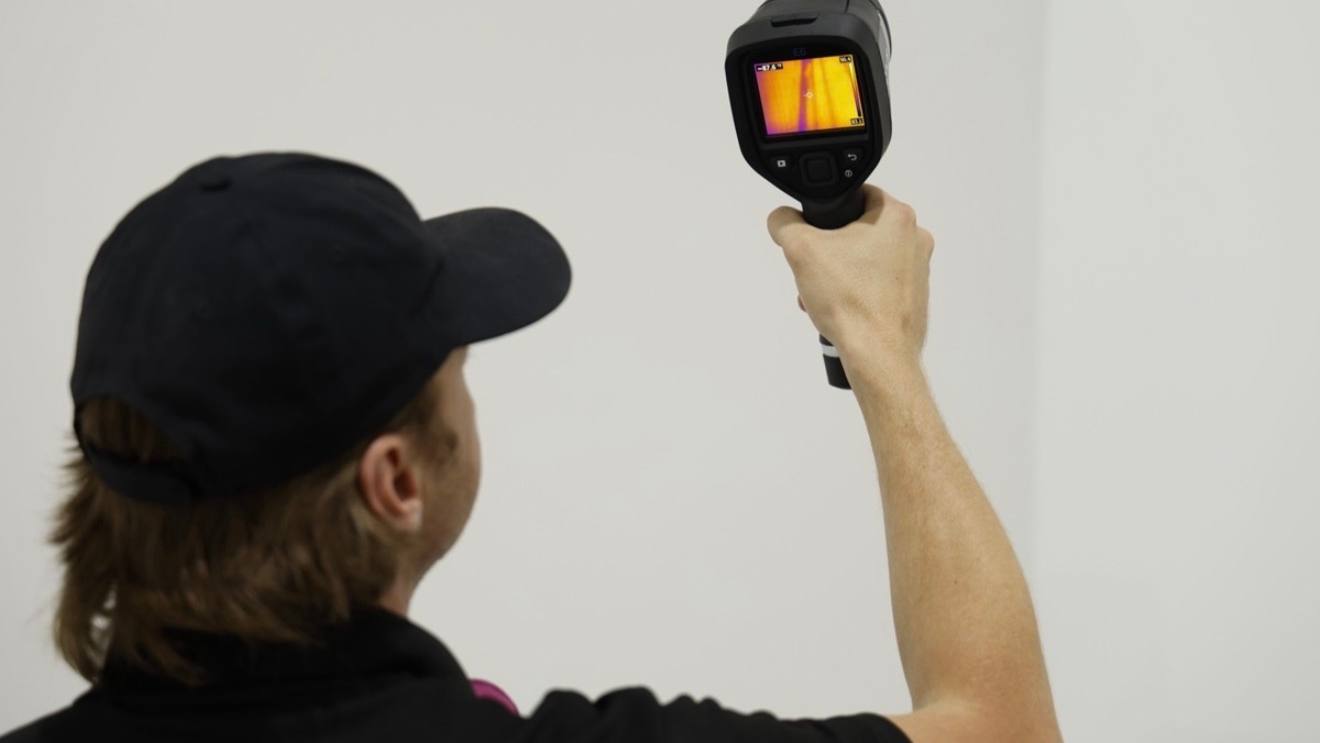
Step 4: Thermal Imaging Inspection
Thermal imaging can help locate temperature differences that may indicate hidden moisture, missing insulation, air leaks, or condensation-prone areas.
This is especially useful for:
Ceiling stains Wall cavities Roof leak investigations AC-related condensation Hidden plumbing leaks Moisture behind cabinets or baseboards
Thermal imaging does not “see mold.” It helps identify possible moisture patterns that should be confirmed with other inspection methods.
Step 5: Air and Surface Sampling
When mold testing is needed, air and surface sampling should be performed by a third-party licensed mold assessor.
This is important because Florida separates mold assessment and mold remediation to help avoid conflicts of interest. A licensed mold assessor can collect samples, send them to a laboratory, and provide independent testing results.
Common sample types include:
Indoor air samples Outdoor control samples Surface swabs Tape-lift samples Bulk material samples when needed
Air sampling helps compare indoor mold spore levels to outdoor conditions. Surface sampling can help confirm whether visible discoloration is mold or another substance.
Masterpros can coordinate with independent third-party licensed mold assessors when professional mold testing or a formal mold protocol is required.
Step 6: Identifying the Moisture Source
Mold remediation should not begin without understanding the moisture source.
Common sources include:
Burst or leaking pipes Shower or tub leaks Roof leaks Window leaks AC drain line backups Condensation on ductwork High humidity from AC fan set to ON Poor attic ventilation Water trapped under flooring
If the moisture source is not corrected, mold can return even after cleaning or removal.
Step 7: Inspection Findings and Recommendations
After the inspection, the findings should be explained clearly.
A professional inspection may include:
Photos of affected areas Moisture readings Thermal imaging findings Visible damage observations Suspected source of moisture Recommended next steps Areas requiring removal or further evaluation Whether third-party testing or a mold protocol is recommended
If a licensed mold assessor performs sampling, laboratory results and a written protocol may be provided separately. This protocol can define the scope of remediation and help property owners compare estimates from licensed mold remediation companies.
What Happens If Mold Remediation Is Needed?
If remediation is required, the work may include:
Containment of affected areas Negative air pressure HEPA air filtration Removal of contaminated drywall, insulation, flooring, or other porous materials HEPA vacuuming Cleaning of structural materials Antimicrobial treatment where appropriate Drying with commercial equipment Final cleaning Post-remediation verification by a third-party assessor when required
The exact process depends on the source, extent of contamination, building materials affected, and assessment findings.
How to Prepare for a Mold Inspection
To get the most accurate results:
Do not clean visible mold before the inspection. Do not paint over stains or discoloration. Keep windows and doors closed before air sampling if instructed. Run your HVAC system normally unless told otherwise. Make a list of areas with odors, stains, leaks, or symptoms. Provide access to attics, closets, utility rooms, and affected rooms.
The more information available during the inspection, the easier it is to identify the source.
Choose Masterpros for Mold Inspections and Remediation in South Florida
Masterpros provides professional mold inspections, licensed mold remediation, water damage restoration, moisture detection, structural drying, and repair services throughout Hollywood, Fort Lauderdale, Miami, Hallandale Beach, Pembroke Pines, Miramar, Aventura, Sunny Isles Beach, Boca Raton, and surrounding South Florida areas.
Our team uses professional moisture detection equipment, thermal imaging, HEPA filtration, containment systems, and industry-standard remediation methods to help identify moisture issues and safely restore affected properties.
When laboratory mold testing or formal air and surface sampling is needed, samples should be collected by a third-party licensed mold assessor to provide independent results and proper documentation.
Final Thoughts
A mold inspection should give you clear answers — not confusion, pressure, or guesswork.
The most important part of the inspection is not the equipment. It is the knowledge and experience behind the inspection process. Proper moisture detection, source identification, documentation, and independent third-party testing when needed can help ensure the right remediation plan is followed.
If you notice musty odors, visible mold, water stains, or hidden moisture concerns, schedule a professional mold inspection with Masterpros and take action before the problem spreads.